1.) Select Campaigns from the navigation menu, then select the +New campaign button:

The Create new campaign page is displayed:

2.) Complete the form fields and select the Next button .
Field Name | Details |
Campaign name* (mandatory) | This name should be meaningful to the users. It can reflect the frequency or a high level description of the content. It can be an assignment due to clicking a link in a phishing simulation email or submitting a username and password in a phishing simulation email. It should be descriptive enough that administrators will recognize when to use it and leaners will understand the purpose of the assignment. Examples: Annual Information Security Training (Level I) / Q1 Quarterly Security Training Assignment / Phish Click Training Assignment / Phish Submit Training Assigment / OOPS! You clicked a link in a phishing simulation email. / OOPS! You submitted your username and password in a phising simulation. |
Campaign start date* (mandatory) | This is the date and time that users will begin to receive their training assignment emails. If you are assigning this campaign on a phishing event (User clicked, User replied, User submitted), this should match the scheduled date and start time of the associated phishing campaign. |
Due date for learners* (mandatory) | This is the date and time that users who have not completed the entire campaign will begin to receive the overdue reminder email. If you are assigning this campaign on a phishing event (User clicked, User replied, User submitted), this should match the scheduled date and end time of the associated phishing campaign. |
Campaign end date* (mandatory) | This is the date and time that the campaign will end. When this date has been reached, users can no longer complete training. Any users who did not complete the training in time will need to be added to a supplementary campaign. If you are assigning this campaign on a phishing event (User clicked, User replied, User submitted), this date and time should allow any user who may have triggered a phishing event late in the phishing campaign enough time to complete the training. E.g. If your training campaign is 4 weeks long, you should give users 4 weeks after the training due date to complete the training. |
Time zone (verify) | Set the appropriate time zone for the above dates. |
Campaign welcome message (optional) | You can include any information that may be helpful to the users. This may include the type of training, support phone and email should learners have questions or issues, etc. If you are assigning this campaign on a phishing event (User clicked, User replied, User submitted), you may want to include information on why they were assigned the training. Example: You have been assigned this training because you clicked a link in a phishing simulation email. This training is designed to help you identify threats and take corrective measures. It will help protect you from cyber attacks at work and at home. |
3.) You can either select the template you would like to use by selecting the Start with a template button, then select the Training template:

OR…
Select the Select your own modules button, then select the module grouping button, then select the invidual modules. When you are finished selecting modules, select the Next button:

| You can preview modules and get more information about the contents and languages supported by clicking on the View details link for each module. |
3.) Reorder the content (if desired) by selecting the 6 dots next to the name and dragging the module to the correct position:

Select the Next button to continue.
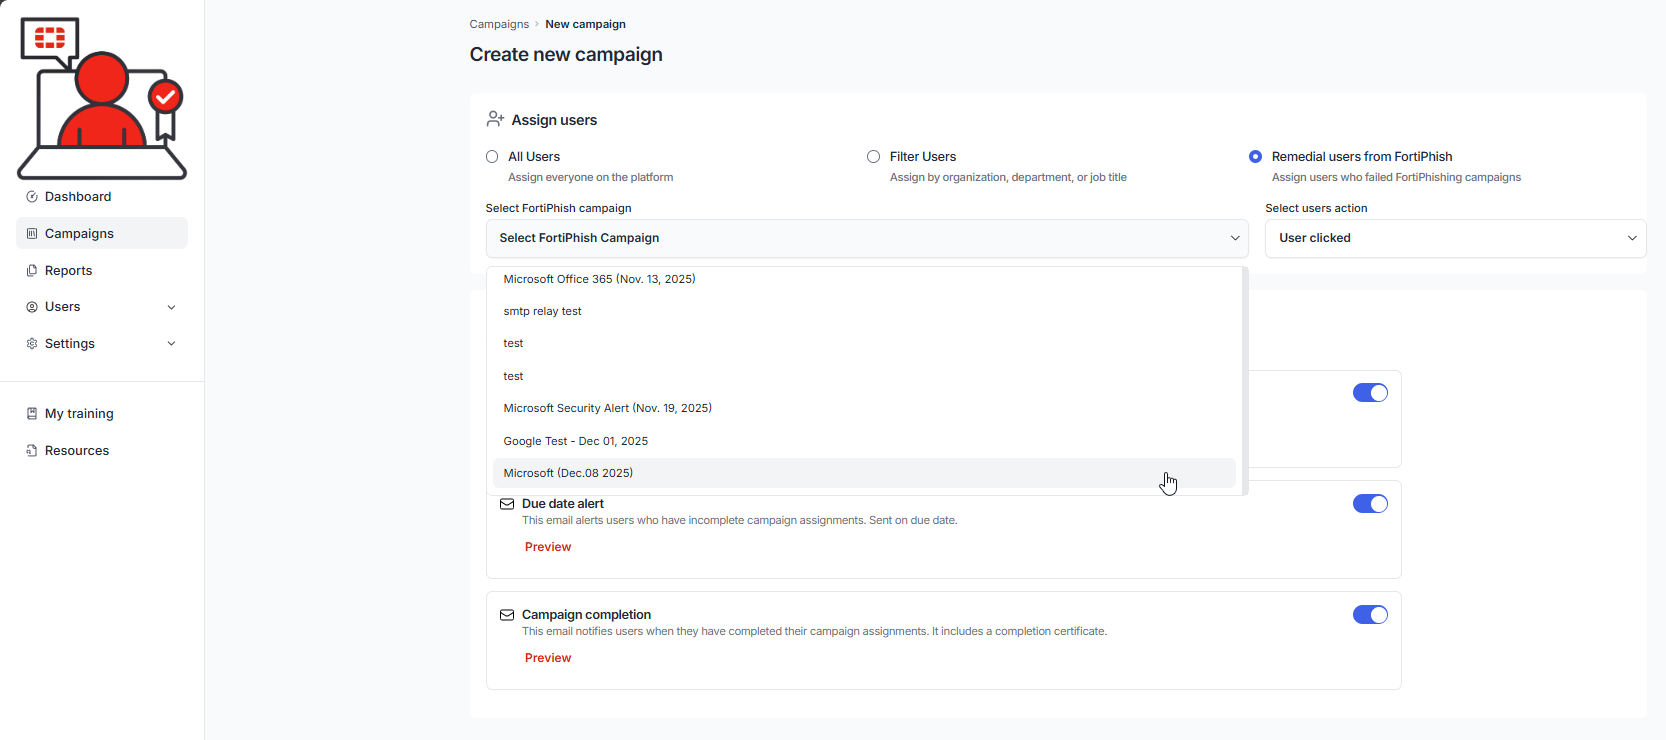
4.) Choose if this campaign will be assigned to All Users, Specific Groups or Remedial users from FortiPhish:
If you select All Users, every user will receive the training assignment

If you select Specific Groups, you will be able to assign to users based on your imported department and title unique values:

If you select Remedial users from FortiPhish, you will be able to choose the applicable FortiPhish campaign and user action:

5.) You may choose to turn off the email notifications:

Reasons you may wish to disable one or more notifications:
- You plan to send the invitation emails from a different email client.
- You plan to send the reminders from a different email client.
- The campaign assignment is tied to a phishing campaign and you do not want to send a certificate and completion email for phishing assignments.
- Now you can launch the campaign by selecting the Launch campaign button. The campaign will remain in a Scheduled state until the configured start date and time are reached at which point its status will change to In progress. If you want to save the campaign as a draft, select the Cancel button and an option to Save as draft or Cancel will be presented:

If you save as draft, the campaign will appear as a Draft on the Campaigns page:

Was this article helpful?
That’s Great!
Thank you for your feedback
Sorry! We couldn't be helpful
Thank you for your feedback
Feedback sent
We appreciate your effort and will try to fix the article