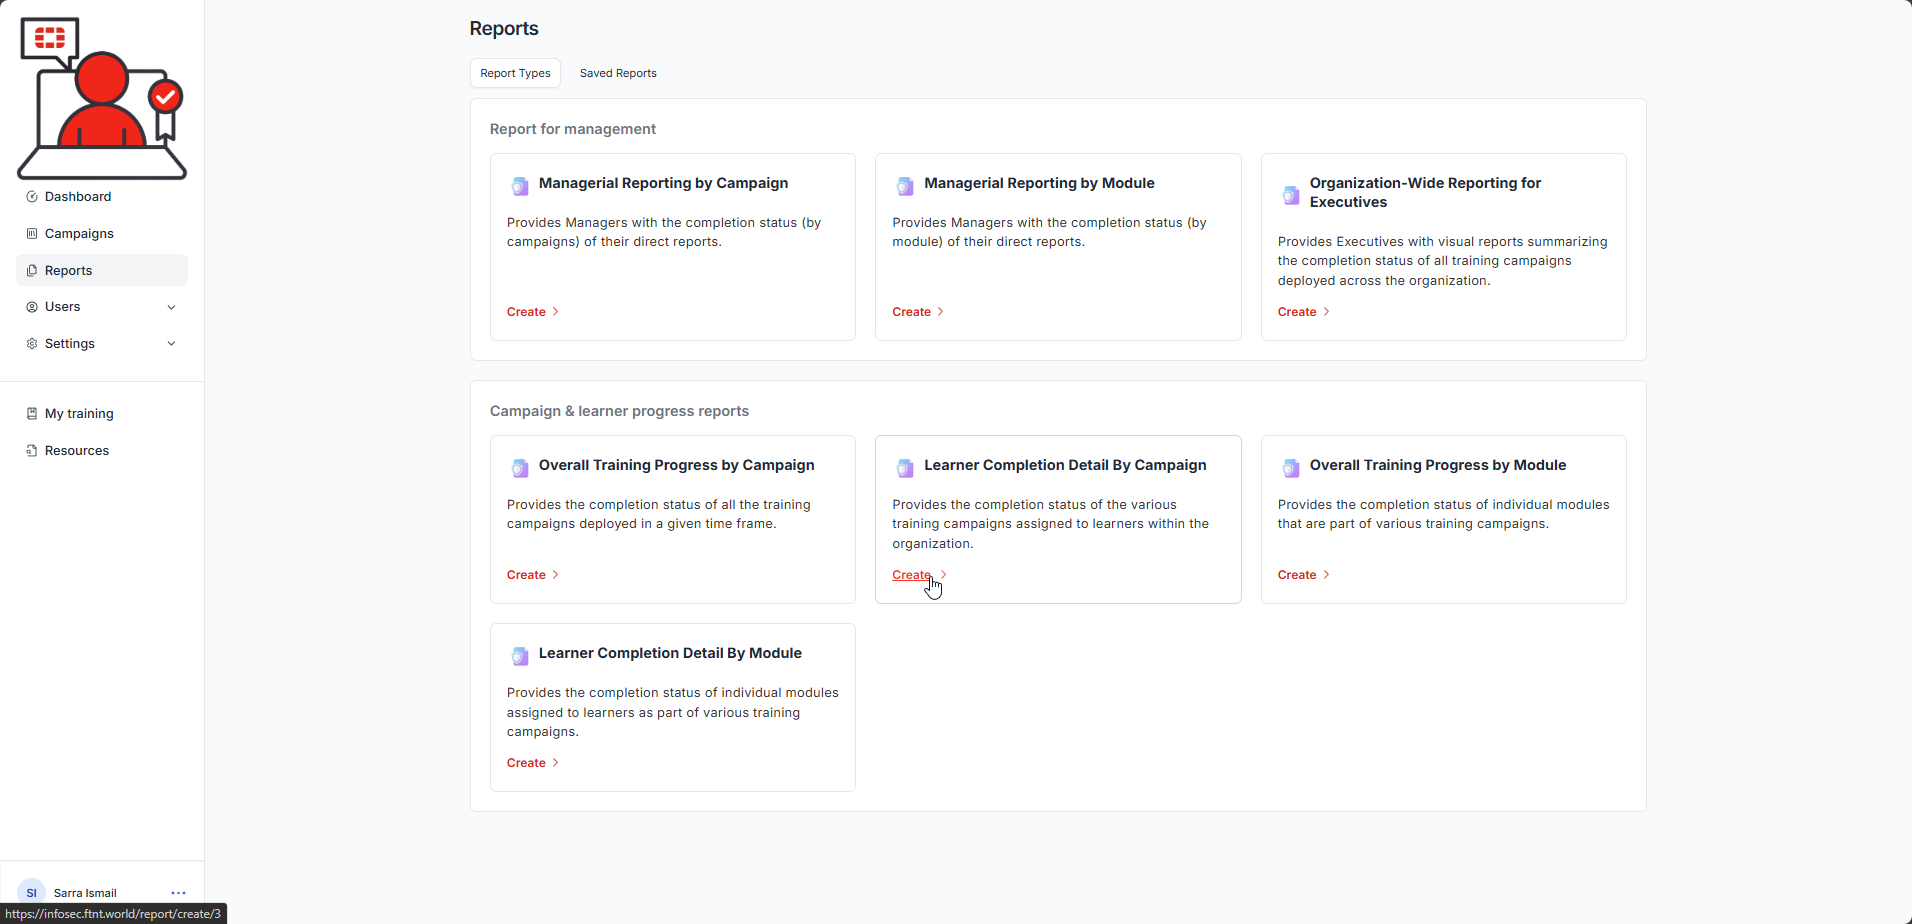
1.) Select Reports from the navigation menu, then click the Create button for the type of report you wish to create:

The New report page is displayed:

2.) Give your report a meaningful name.

In the above example, the name contains: <campaign name> - <report type> (<department>)
| It is important that you use good naming conventions so that when you create a report, you can recognize what the report is for (reporting on). You should include the type of report you selected, the campaign it is tied to and the department (if you wish to create a separate report to be emailed to a specific person for their staff). You can also report on all data, export as an xlsx and then extract the data department by department to manually send the report to the appropriate department manager. |
3.) From the Filter by campaigns dropdown, select the Campaign you would like to create the report for:

4.) If you wish to create a report department by department, from the Filter by department dropdown, select the department you wish to create the report for, or report for all departments:

5.) Choose the format you would like the report to be sent in:

6.) If you wish to just save the report and not schedule it, then click the Save Report button, otherwise select the Schedule option button to set a schedule:

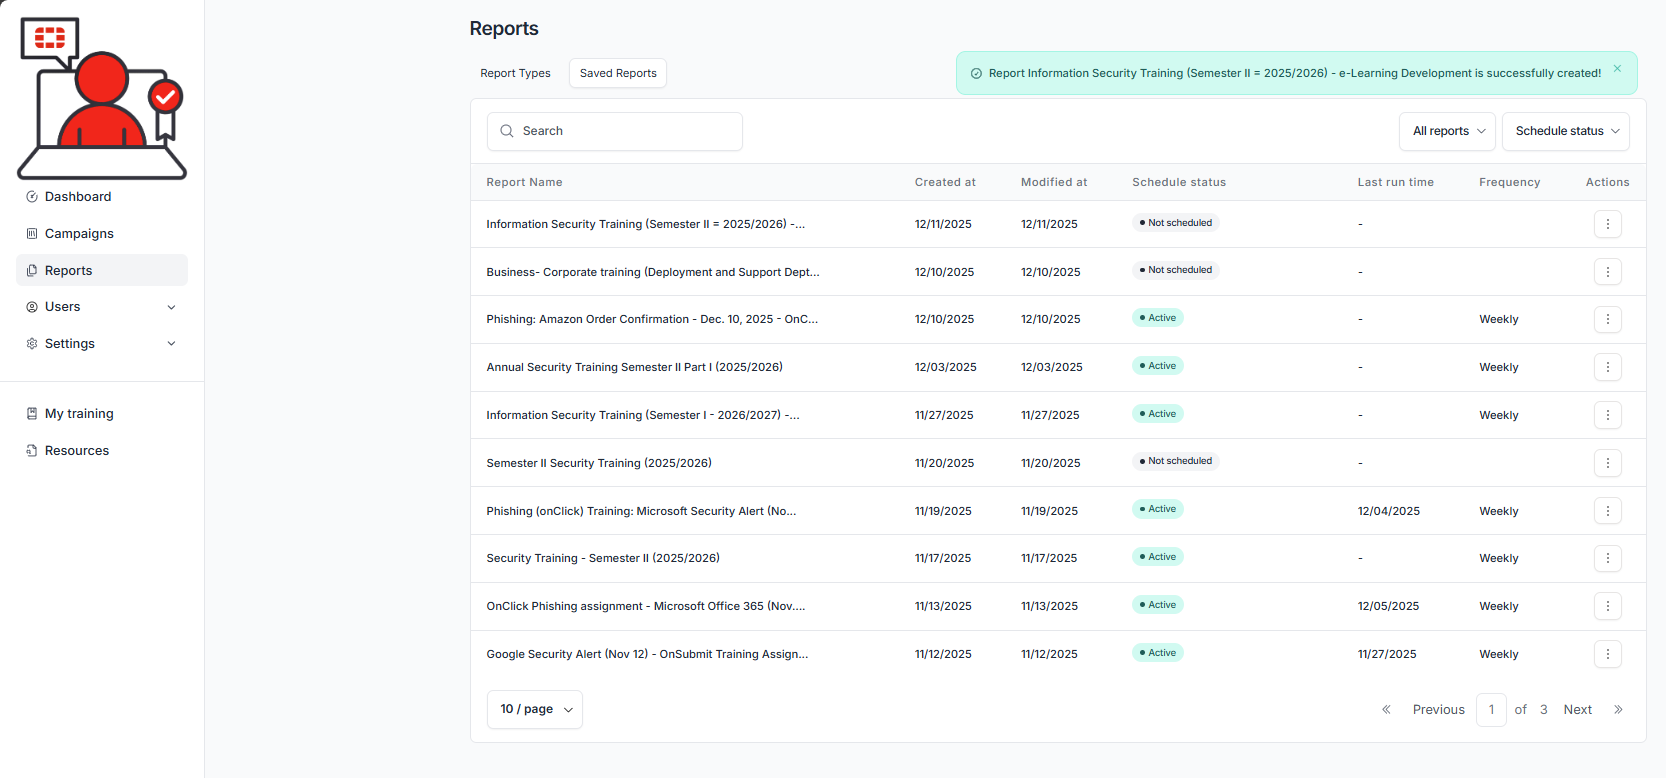
If you selected the Save button, a confirmation message is displayed and the new report appears under the Saved Reports tab:

If scheduling the report, after turning the Schedule toggle on, complete the Schedule form:

7.) Search and add users who should receive the report using the Send to search field.

8.) Select the frequency the report should be sent (Once only / Once a week / Once a month / Annually) from the Set how often the report should be sent option button:

9.) Enter the start and end dates for sending the report. The start date is typically the start date (end of day hour, e.g. 6 p.m.) and the end date should be the last day of the campaign (i.e. the campaign end date, not the learner due date).

10.) Verify your time zone is correctly set. The report will be sent at the times specified in the configured time zone.
11.) Click the Save Report button:

12.) You should receive a confirmation message and see the new report listed under the Saved Reports tab:

Was this article helpful?
That’s Great!
Thank you for your feedback
Sorry! We couldn't be helpful
Thank you for your feedback
Feedback sent
We appreciate your effort and will try to fix the article