| These steps must be performed in addition to configuring the SAML2 SSO application for authentication of users. You will need to be logged in to the Entra/Azure/O365 Admin console as the administrator. You will also need to be logged in to the FortiSATS Admin console as the tenant administrator. To configure SAML2 SSO for Microsoft, refer to this article: (V3.x) How do I Configure SAML2 Single Sign-on (Authentication) to use Azure AD SSO? |
1.) Log in to the Microsoft Entra Admin Console
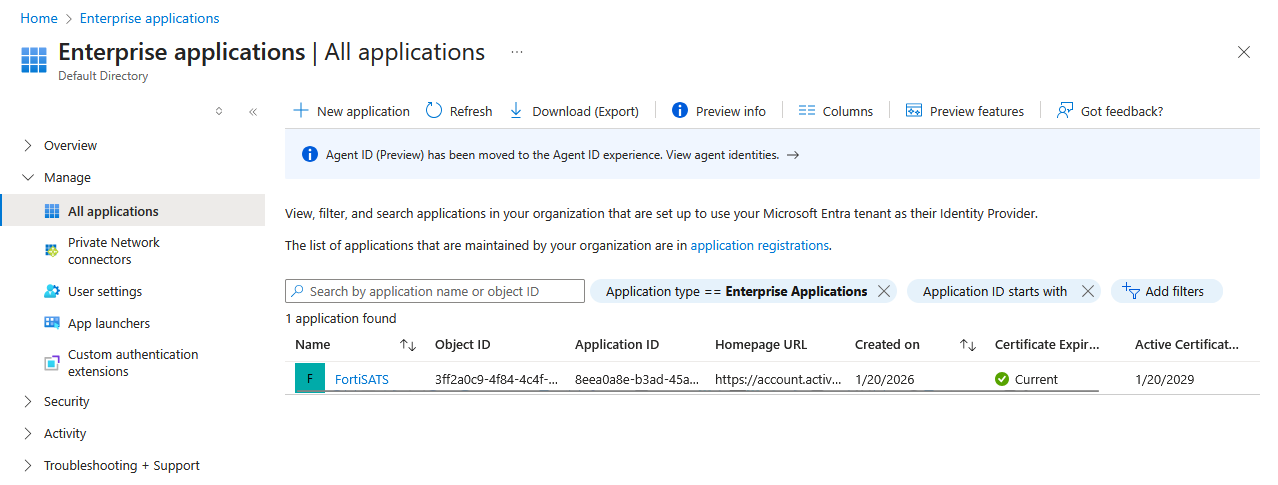
2.) Search for Enterprise applications and select the icon to access the Enterprise applications console.
The Enterprise Applications page is displayed.:
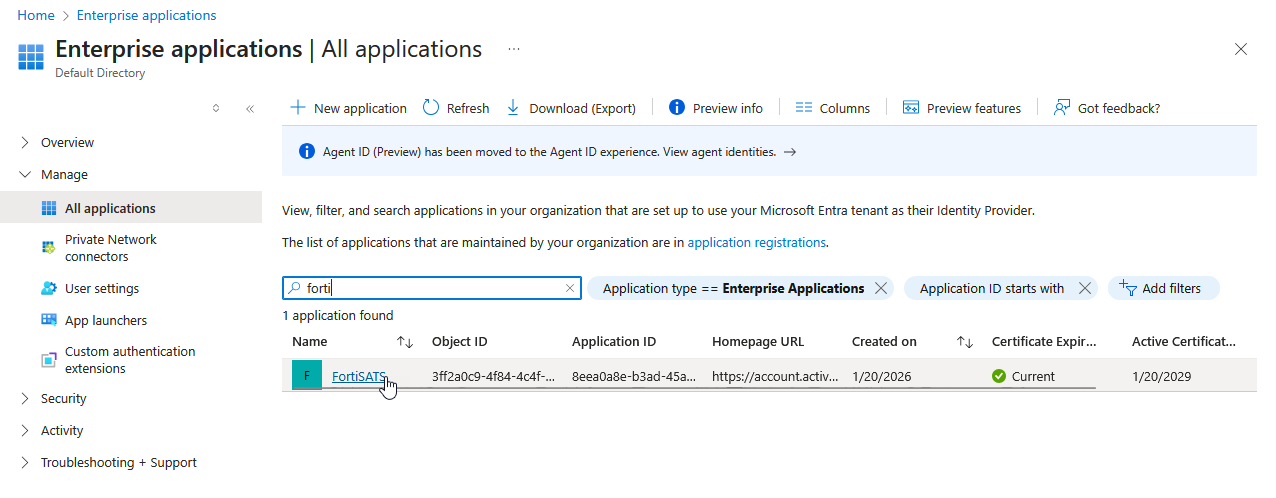
3.) Search for and/or click on the Single Sign-on (SSO) SAML 2 app you created for FortiSATS.
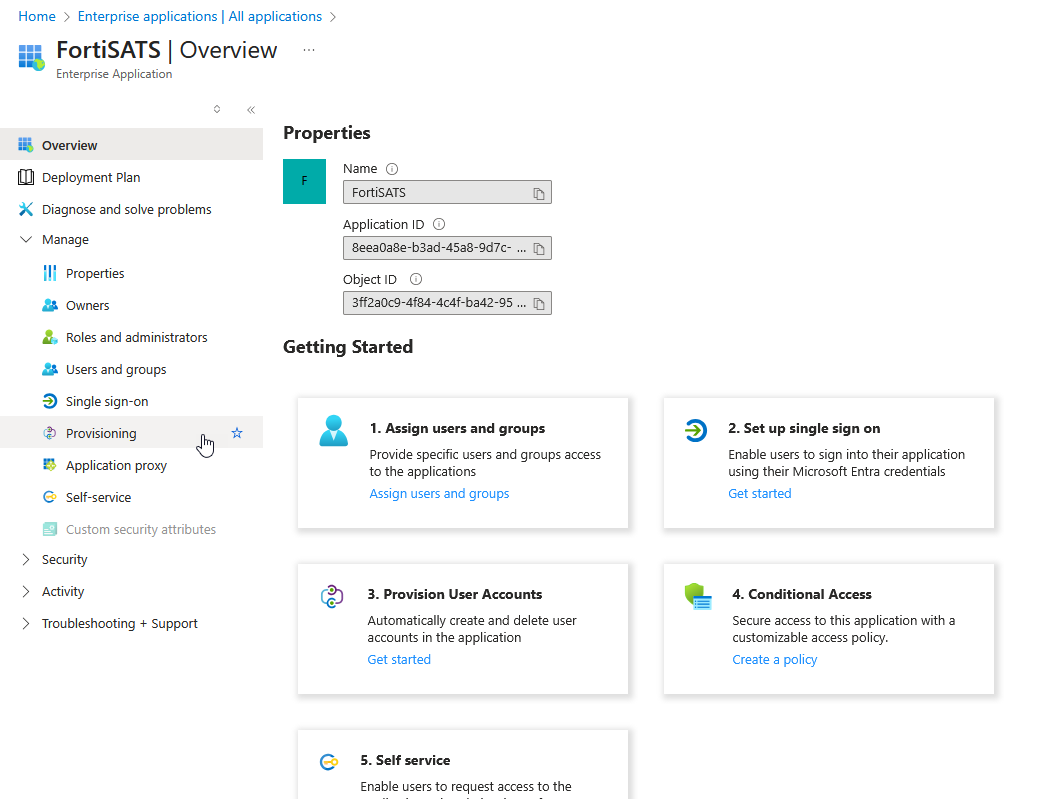
4.) After selecting the SSO (SAML2) app you configured previously, select the app. Now you may either click on Provisioning in the navigation menu OR select the Get Started link in the Getting Started, section 3. Provision User Accounts:
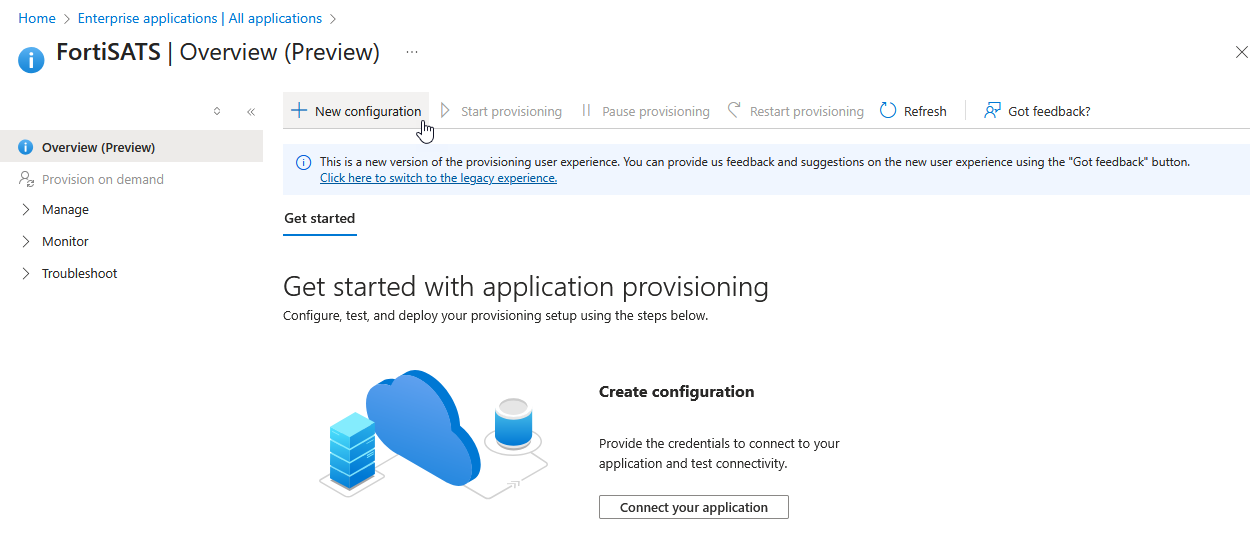
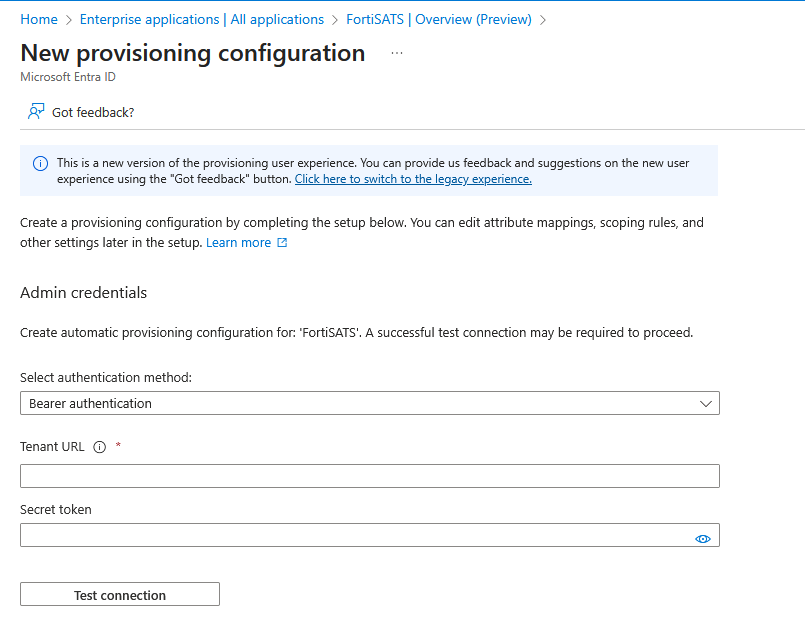
5.) Select + New Configuration from the top of the right-hand hand pane:
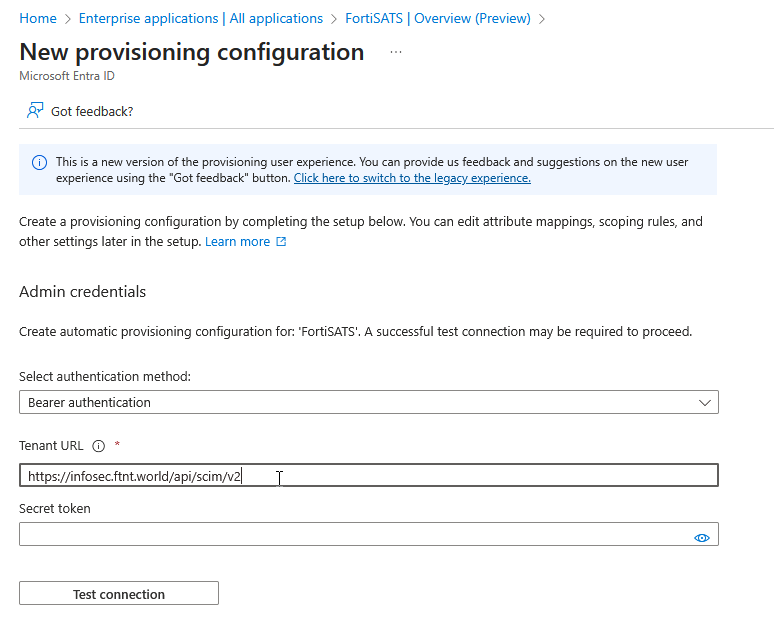
6.) Ensure that the Select authentication method drop down setting is set to: Bearer authentication:
7.) Access the FortiSATS console as the tenant administrator.
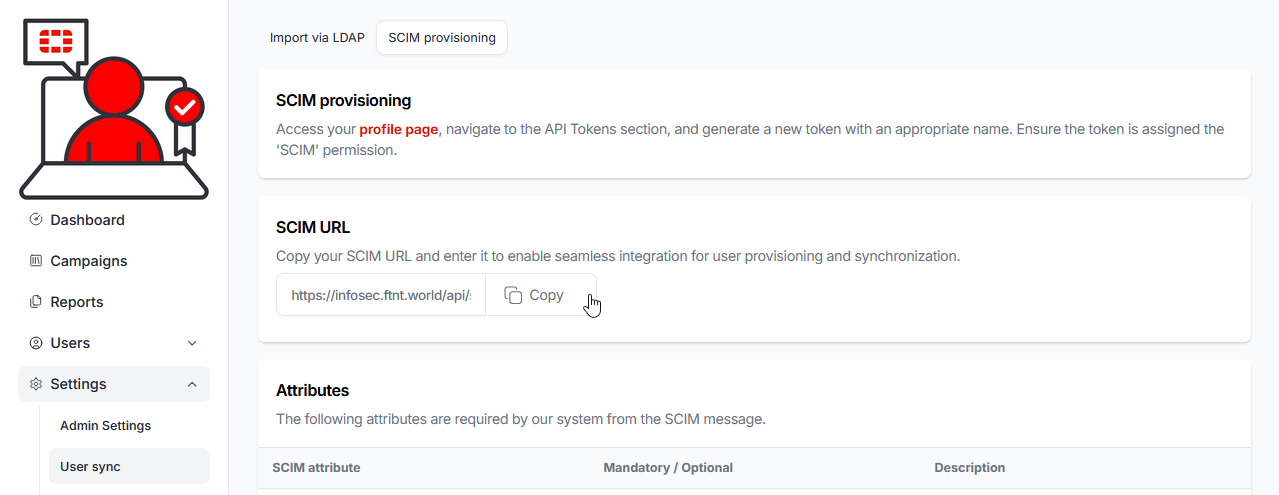
8.) In the FortiSATS Administration interface, select Settings from the navigation menu, then select the User sync sub-menu item:
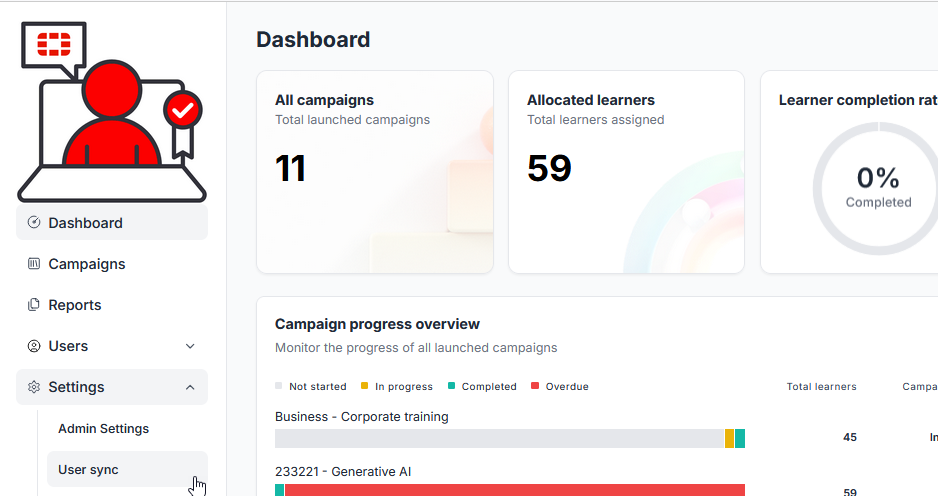
The User sync page is displayed:
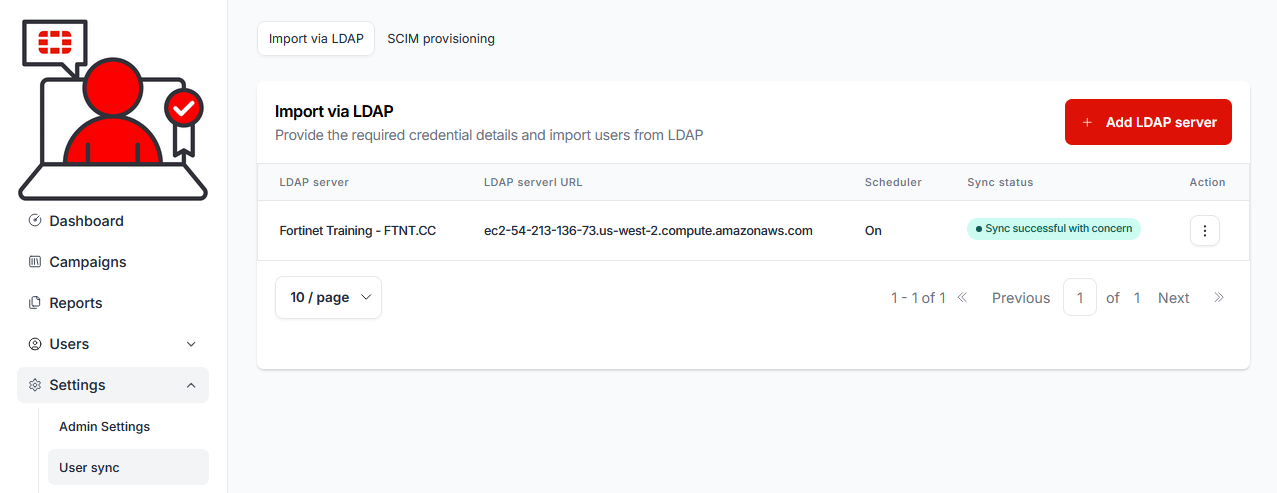
9.) Select the SCIM provisioning tab:

The SCIM provisioning page is displayed:
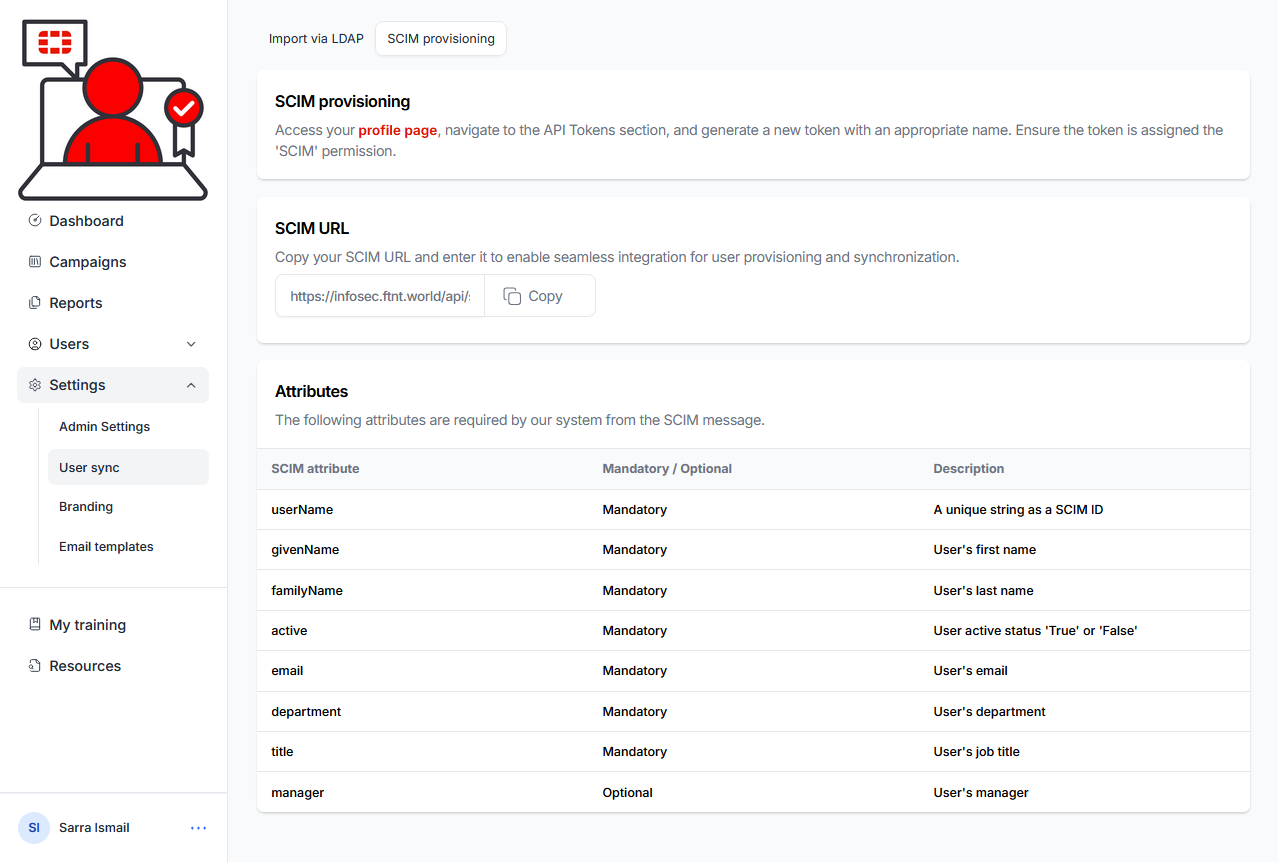
10.) Click the copy button to copy the SCIM URL:
11.) Paste the SCIM URL into the Tenant URL field in Microsoft Entra:
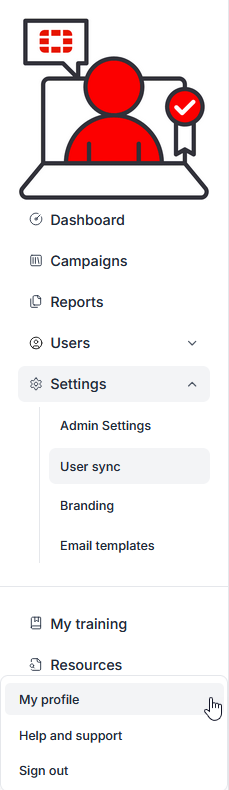
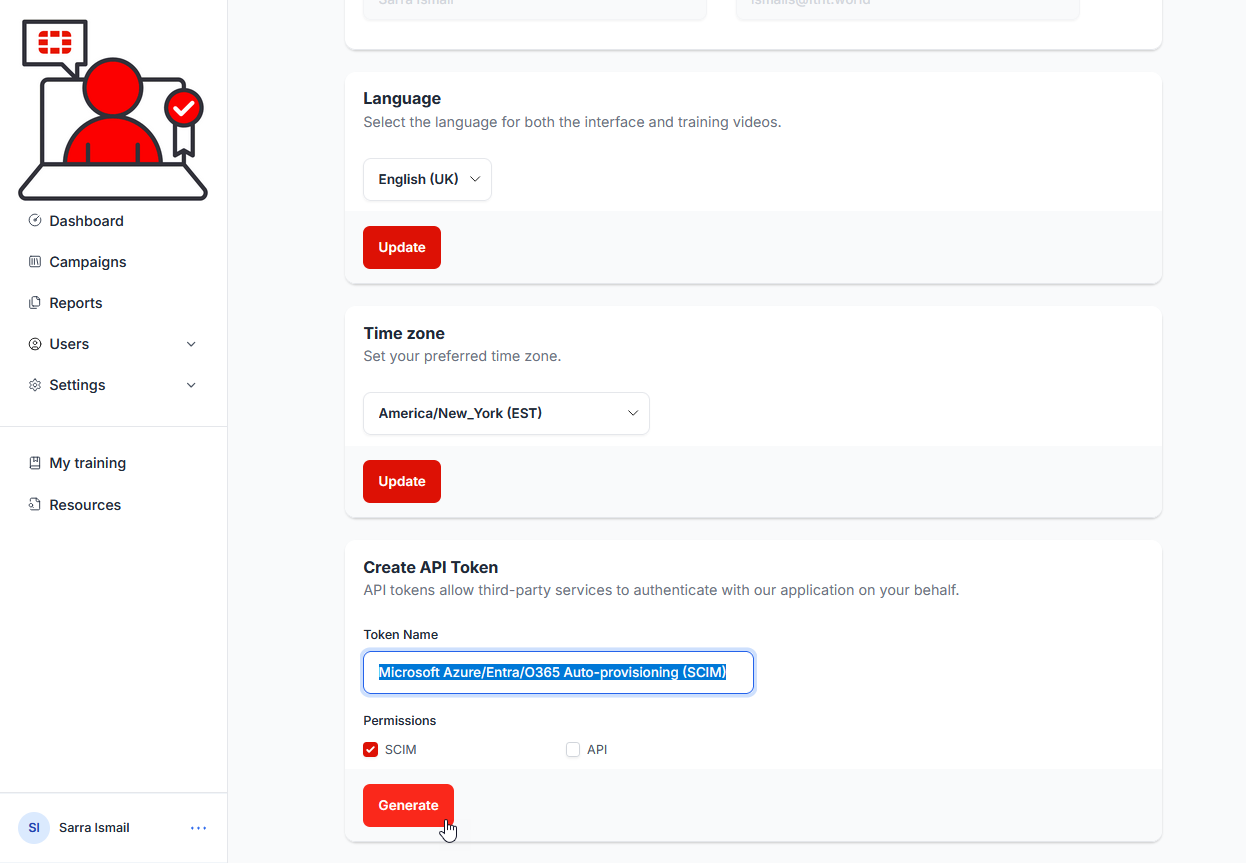
12.) From the Security Awareness and Training Service admin console, Select My profile from the user menu in the lower left corner of the service interface:
The My profile page is displayed:
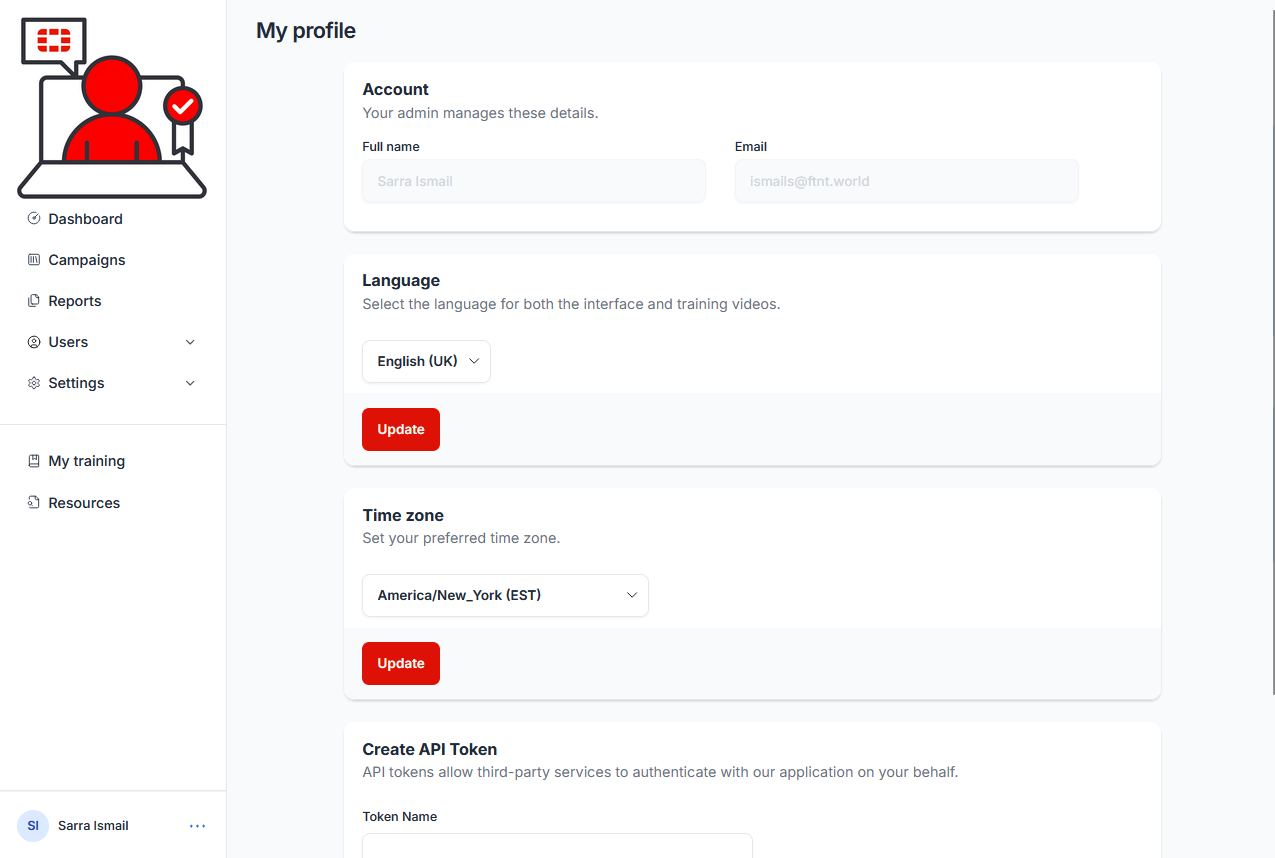
13) In the Create API Token section, give the token a meaningful name (e.g. Microsoft Azure/Entra/O365 Auto-provisioning (SCIM) ), ensure that the SCIM permission checkbox is checked, and select the Generate button:
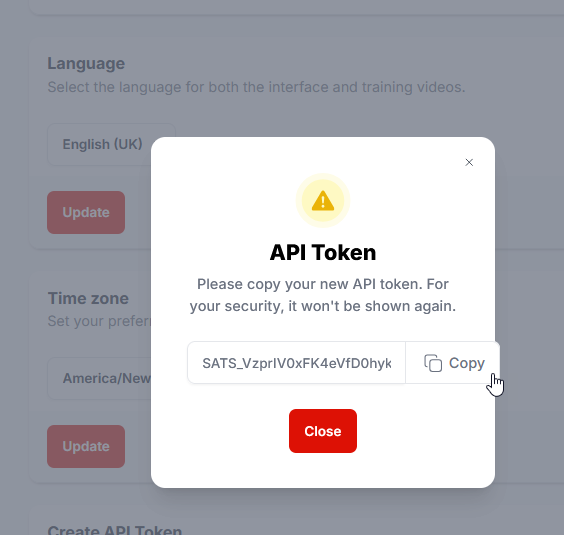
The API Token dialogue is presented.
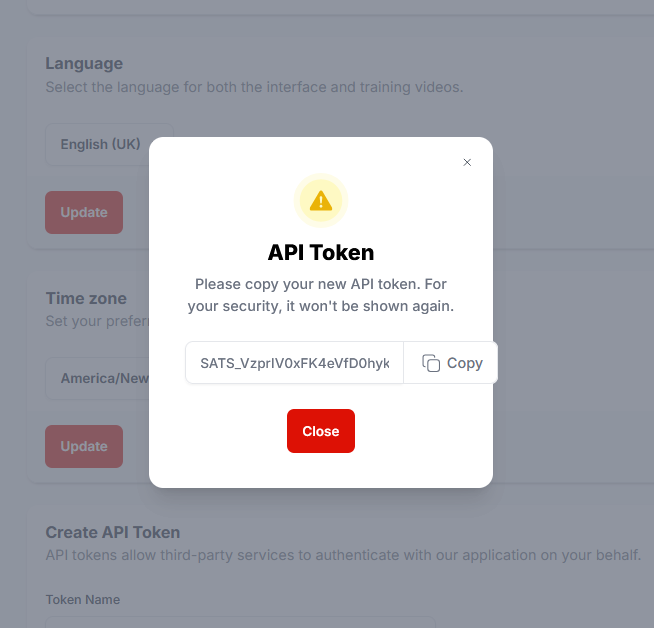
14) Click the Copy button to copy the token:
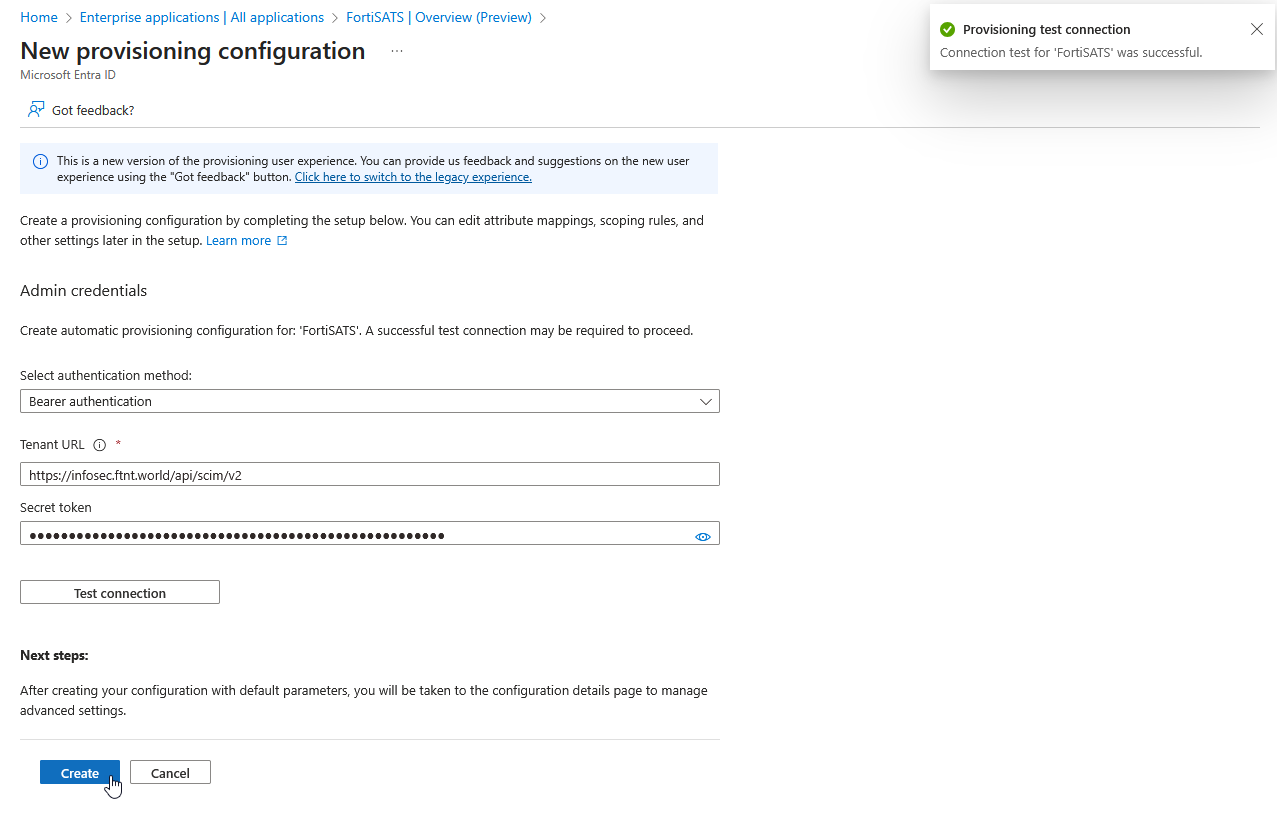
15) Paste the token into the Secret token field in the Microsoft Entra admin and then select the Test Connection button to ensure the credentials are accepted:
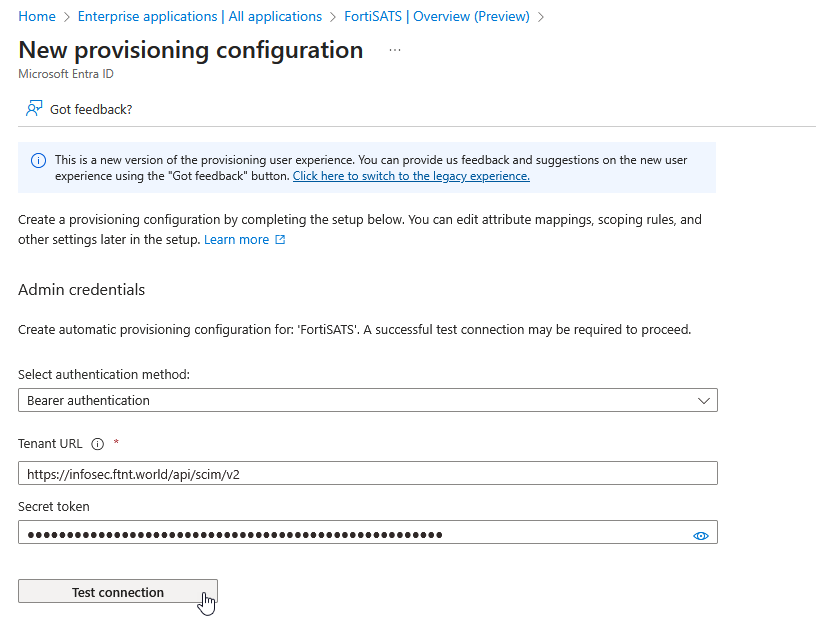
16.) If the test succeeds, you will receive a confirmation in the upper right-hand corner. Select the Create button in the lower left-hand side of the New provisioning configuration screen:
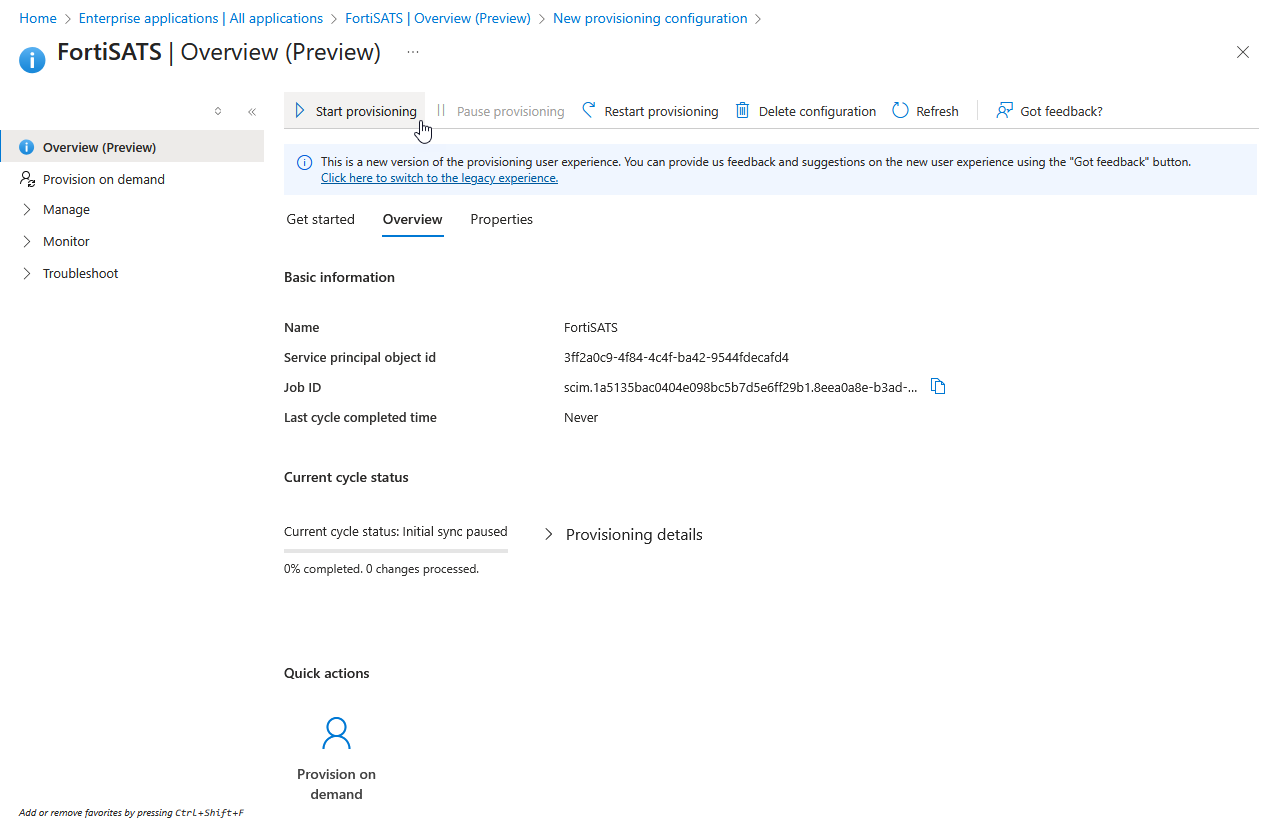
17) Once created, select the Start provisioning button in the upper left-hand quadrant of the right-hand pane (and confirm the action in the Start provisioning pop-up):
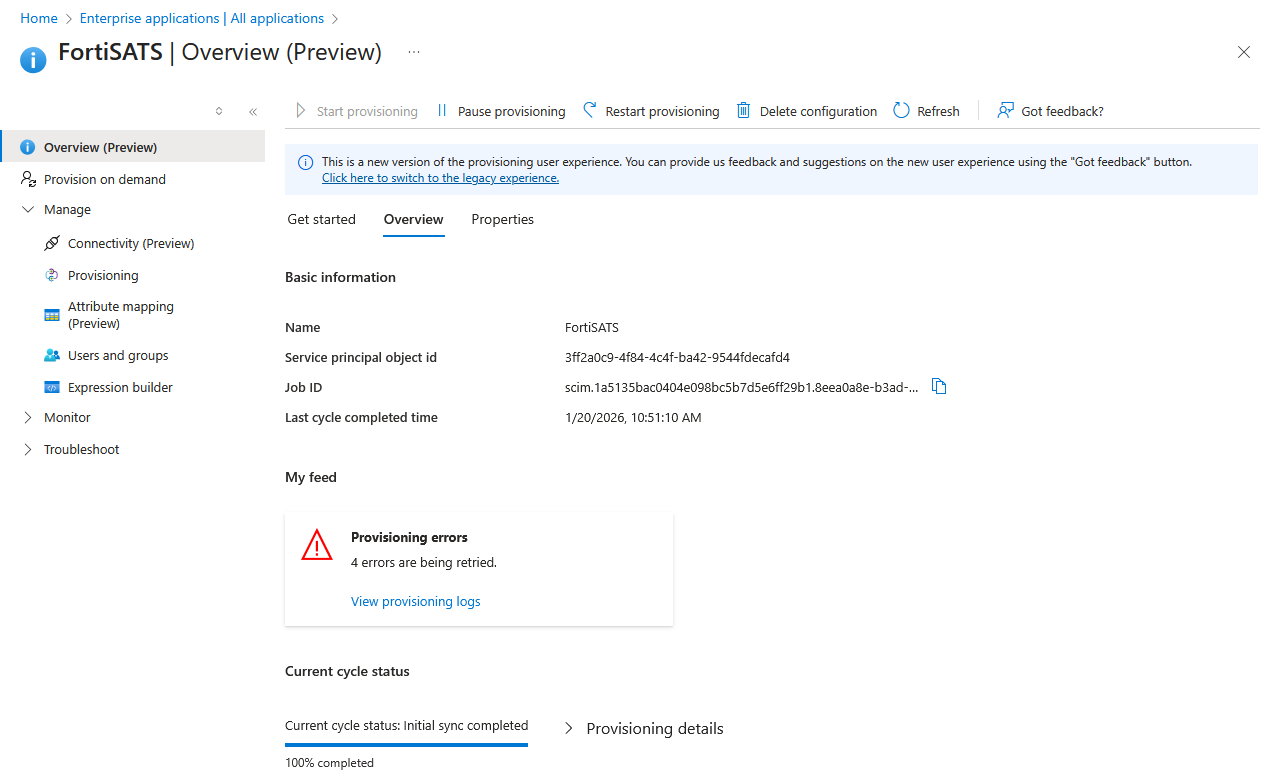
| It may take up to 40 minutes for users to start showing up in the service. You can test with a single user by using the Provision on demand quick action (see above screenshot). All user data is pushed from the Azure LDAP server based on the configuration settings and attribute mappings. If a user entry does not contain of the mandatory attributes, the user will be skipped. The only information Fortinet provides is the url and token. If users are missing or not synching, check the attributes and the Microsoft auto-provisioning logs. |
How to check Microsoft Azure/Entra/O365 enterprise application SCIM provisioning logs
1.) Return to the main Overview (preview) page for the Enterprise app you created for SSO / User-provsioning.
2.) Select either the Provisioning navigation menu item OR select Get Started in the 3. Provision User Accounts section of the Getting Started buttons in the right-hand pane:
The Provisioning Overiew (Preview) page is displayed:
3.) Expand the Monitor navigation menu item, then select the Provisioning logs sub menu item to display the logs:
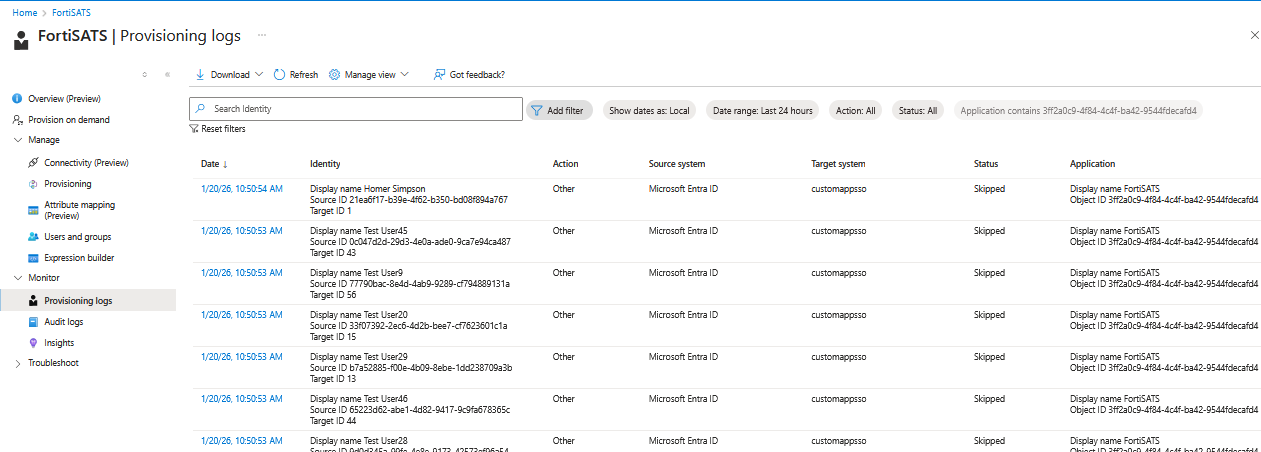
You can get more details on why the user was not synchronized by clicking on one of the date and timestamps to left of each entry, then selecting the Troubleshooting and Recommendations tab:
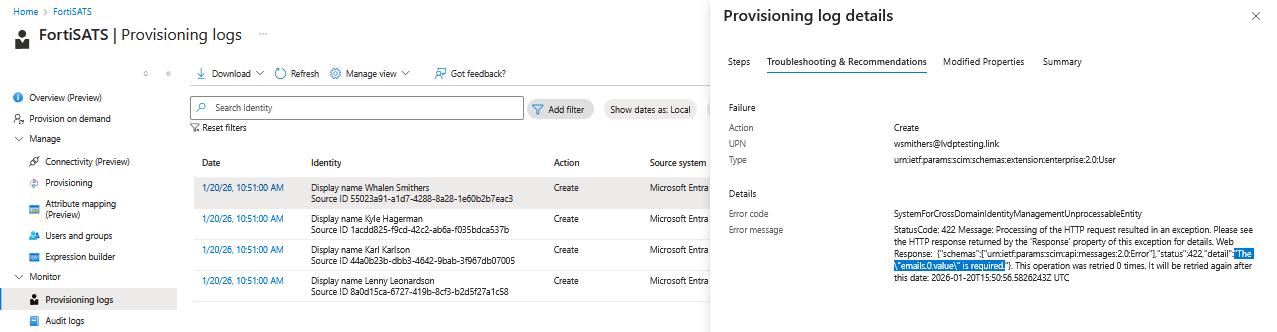
After correcting issues, the users should synchronize on the next synchronization push from Azure AD.
Was this article helpful?
That’s Great!
Thank you for your feedback
Sorry! We couldn't be helpful
Thank you for your feedback
Feedback sent
We appreciate your effort and will try to fix the article